
Packaging a PostScript Printer Description (PPD) file as a signed Windows 10 x64 printer driver
Why?
After getting my Polaroid CI-5000 film recorder working as a PostScript-compatible printer on Windows 98SE, I wanted to share that to my Windows 10 editing PC.
I foolishly expected this would just work using Windows' printer sharing, like my considerably more modern (but still ancient) HP LaserJet.
NOPE.
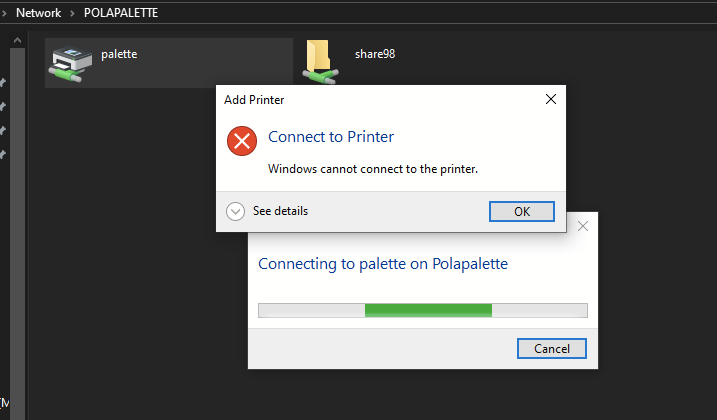
Turns out you need a working driver for both the server and client systems, and the newest I had was for Windows NT4.
So, here's a guide on how I turned my film recorder's NT4 driver into a shiny new Windows 10 one!
Disclaimer:
Follow this guide at your own risk!
I am not responsible for any mistakes, viruses, explosions, dead film recorders, or anything else!
I have done my best to ensure this guide is as accurate as possible, and these instructions did work for me!
However, I am not a professional Windows driver developer, and only just about understand what I'm doing :)
Therefore, some things may be wrong or poorly explained!
(if I made a mistake though, please contact me and I'll fix it!)
Finally, I will not provide any support, so be warned!
Prerequisites:
- A Windows 10 machine with SMB1.0 client support enabled
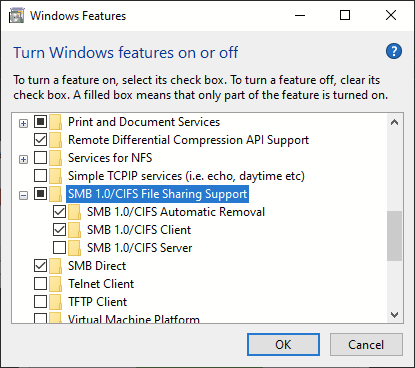

DO NOT ENABLE THIS ON AN INTERNET-CONNECTED MACHINE!!!
SMB1.0 is highly insecure, and opens up your machine to all kinds of fun exploits/ransomware!
ONLY do this if you're 100% sure that your security is up to snuff! (isolated VLAN etc)
There's a reason it's disabled by default :)
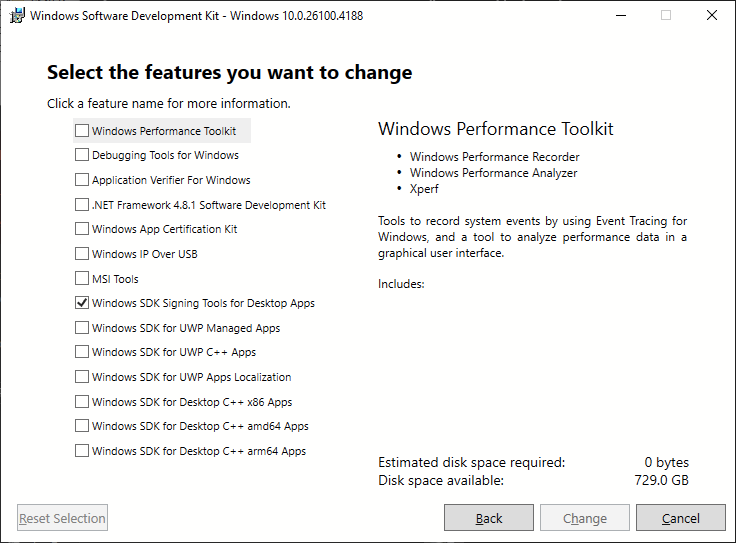
- both the Windows SDK and the Windows Driver Kit (WDK) installed on your machine
You'll only need the Windows SDK Signing Tools for Desktop Apps installed from the SDK, the rest is unnecessary

- the appropriate Windows NT driver and .PPD file for your film recorder (or printer) copied to your Windows 10 machine
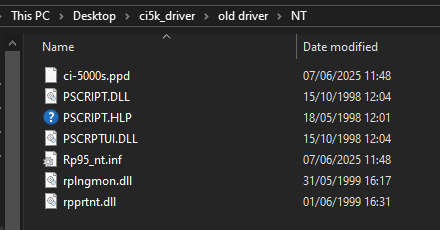

I grabbed these out of my installation of RasterPlus95 on a Win98SE VM.
If you're using this too, copy the entire C:\Program Files\Graphx\RasterPlus95\CrossPlatform\NT folder to a shared directory, as some of the important files are hidden!
Now, you've got all of that together! Awesome!
but first...
How does any of this work?
PostScript is almost like a universal language for printers and printer-like devices, dating right back to the 80s.
Every PostScript device has a PostScript Printer Description (or PPD) file, to tell systems how to use the various features of that device.
It's pretty neat!
I'm oversimplifying a LOT here, but even modern Windows machines have a generic PostScript compatible printer driver built right in, compatible with any PostScript device (in theory).
Backwards compatibility, hell yeah!
However, modern Windows won't just run any old PostScript driver...
It's gonna need:
- to be 64-bit compatible
(10 cannot use 32-bit or 16-bit drivers on a 64-bit system!) - to be digitally signed
(makes sure your driver isn't just five viruses in a trenchcoat, and makes it work on 10) - to have an .inf file in a modern format
(the spec for .inf files has changed a LOT since Windows NT!) - to use the modern PSCRIPT5.DLL driver
(instead of NT's 32-bit PSCRIPT.DLL)
So, let's get started with cooking one of those up for my film recorder
1: Modernising the driver's .INF file
Straight out of RasterPlus95, our Windows NT .inf file looks like this;
[Version]
Signature="$Windows NT$"
Class=Printer
Provider="Graphx"
LayoutFile=layout.inf

[Manufacturer]
"Graphx, Inc."

[Graphx, Inc.]
"Digital Palette CI-5000S"=ci-5000s.ppd

[PSCRIPT]
PSCRIPT.DLL
PSCRPTUI.DLL
PSCRIPT.HLP

[PSCRIPT_DATA]
DriverFile=PSCRIPT.DLL
HelpFile=PSCRIPT.HLP
ConfigFile=PSCRPTUI.DLL
NoTestPage=1

[DestinationDirs]
DefaultDestDir=66000

[ci-5000s.ppd]
CopyFiles=@ci-5000s.ppd,PSCRIPT
DataSection=PSCRIPT_DATA
I modified that by trial and error, using this .inf for GhostPDF as a template, to more closely resemble a modern driver.
Compare this working one to the NT one above!
(don't worry, I'll explain everything that I added or changed!)
[Version]
Signature="$Windows NT$"
Class=Printer
Provider="Graphx"
ClassGUID={4D36E979-E325-11CE-BFC1-08002BE10318}
CatalogFile=CI-5000S.cat

DriverVer=06/07/2025,1.0.0.1

[Manufacturer]
"Polaroid"=Polaroid,NTamd64

[Polaroid.NTamd64]
"Digital Palette CI-5000S" = ci-5000s.ppd, "PRINTENUM\LocalPrintQueue"

[PSCRIPT]
PSCRIPT5.DLL
PS5UI.DLL
PSCRIPT.HLP

[PSCRIPT_DATA]
DriverFile=PSCRIPT5.DLL
HelpFile=PSCRIPT.HLP
ConfigFile=PS5UI.DLL
NoTestPage=1

[DestinationDirs]
DefaultDestDir=66000

[ci-5000s.ppd]
CopyFiles=@ci-5000s.ppd,PSCRIPT
DataSection=PSCRIPT_DATA

[SourceDisksNames]
1=%Disk1%,,,""

[SourceDisksFiles]
ci-5000s.ppd =1
PSCRIPT5.DLL =1
PS5UI.DLL =1
PSCRIPT.HLP =1

[DefaultInstall]
CopyINF=CI-5000S.inf
The first changes I made are in the [Version] block;
- removed non-existent layout.inf
I couldn't actually find this to tell you what it does/did, sorry! - added ClassGUID
this one tells modern Windows that this is specifically a printer driver - added a CatalogFile
this is where the driver's digital signature will be stored! - added the DriverVer(sion)
this verifies that the driver was written whilst the signing certificates were valid
Then, onto the [Manufacturer] block;
- changed "GraphX, Inc" to "Polaroid"
for some reason it would NOT work with the original manufacturer name, sorry GraphX! - added NTAMD64 decorated model sections (Polaroid, NTAMD64)
to tell Windows this is a 64-bit driver
then the hardware ID block, [Polaroid, NTAMD64];
- added the hardware ID "PRINTENUM/LocalPrintQueue"
to tell Windows to use this driver specifically for local print queues
Also in this block is the .PPD description file (in my case ci-5000s.ppd), that's staying unmodified :)
Then, the [PSCRIPT] and [PSCRIPT_DATA] blocks
These tell Windows which PostScript base driver to use
- updated the original PSCRIPT.DLL, PSCRIPTUI.DLL, and PSCRIPT.HLP with their modern PSCRIPT5 equivalents
Those are PSCRIPT5.DLL, PS5UI.DLL and a new PSCRIPT.HLP
I found these new base drivers in the Windows 10 print driver store, under
"C:\Windows\System32\spool\drivers\x64\3"
You'll need to copy these to your working directory with these .inf and .ppd files :)
I then added location pointers to the file.
These tell Windows where to find all the files this .inf references :)
- the [SourceDisksNames] block simply says 'look in the same folder as the .inf file'
- the [SourceDisksFiles] block specifies the location of every file so far referenced is in that current folder
Finally, the [DefaultInstall] block tells Windows to copy this .inf file to its' driver store.
Got all of that?
Nor do I really, but I've linked all the helpful websites I used at the bottom! No ChatGPT here!
and just like that, we have a valid .inf file ready to be packaged and signed!
2: Generating a self-signed cert to sign the new driver
Before we digitally sign anything, we're gonna need a certificate to sign it with.
I wasn't going to use this driver outside of my own PC, so instead of buying a proper code signing cert, I generated one using some nifty PowerShell commands :)
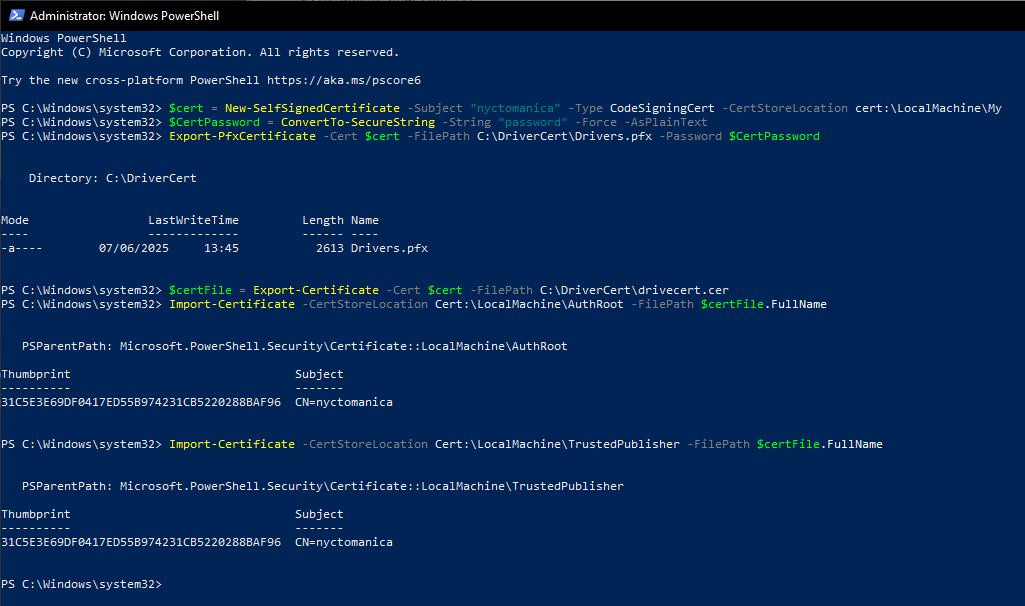
First up, we're going to need a folder to put our newly generated certs in.
I created one at the root of my C drive called "C:\DriverCert"
Then, in an admin PowerShell prompt, run the following commands;
$cert = New-SelfSignedCertificate -Subject "nyctomanica" -Type CodeSigningCert -CertStoreLocation cert:\LocalMachine\My
$CertPassword = ConvertTo-SecureString -String "password" -Force -AsPlainText
Export-PfxCertificate -Cert $cert -FilePath C:\DriverCert\Drivers.pfx -Password $CertPassword
$certFile = Export-Certificate -Cert $cert -FilePath C:\DriverCert\drivecert.cer
Import-Certificate -CertStoreLocation Cert:\LocalMachine\AuthRoot -FilePath $certFile.FullName
Import-Certificate -CertStoreLocation Cert:\LocalMachine\TrustedPublisher -FilePath $certFile.FullName
These generate a new self-signed code signing certificate in the new folder I just made on C, then install it into the system's Root Certificate Store.
You'll probably want to change the Subject to not be "nyctomanica", and the password not to be "password"
and boomski, we have one lovely self-signed cert!
Check to make sure that's in the root store by opening certlm.msc using Run, then look for your certs' subject name :)
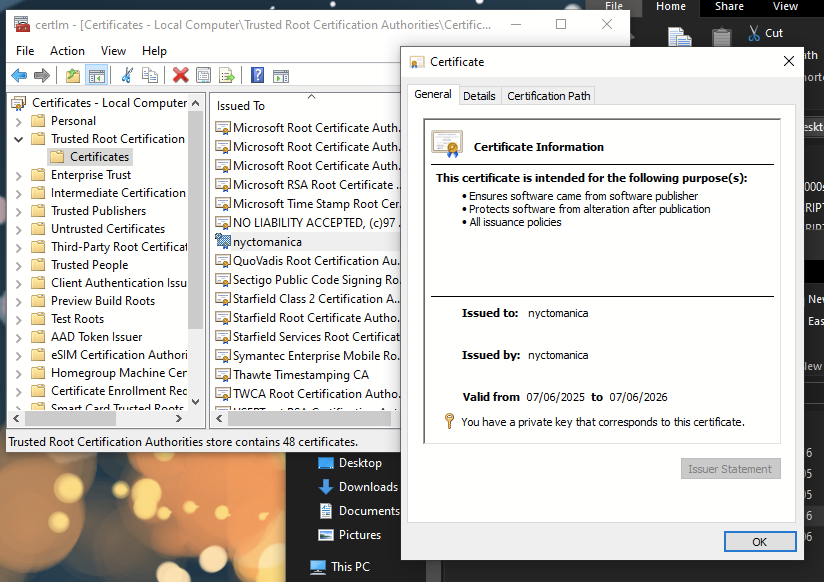
Sweet!
Looks like we're ready to package up our driver with a security catalog(ue)!
3: Packaging the driver, and creating a security catalog(ue)
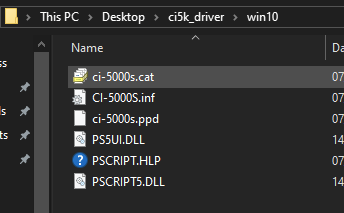
Before we create a security catalog for our driver, it's probably a good idea to put all of the driver files into a nice new folder.
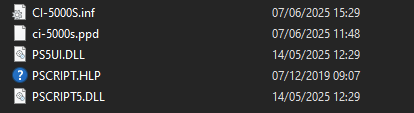
My nice new folder is at C:\Users\nycto\Desktop\ci5k_driver\win10, but yours will be different :)
I'm now going to use a tool called Inf2Cat, part of the Windows Driver Kit we installed earlier :)
This checks to make sure that our driver's .inf file is valid, then creates a new (unsigned) security catalog for our driver, ready to be signed!
In a non-admin command prompt, cd to the location of the Inf2Cat tool.
For me, this was at "C:\Program Files (x86)\Windows Kits\10\bin\10.0.26100.0\x64" , but for you this may be different
then, run Inf2Cat.exe /driver:C:\Users\nycto\Desktop\ci5k_driver\NT /os:10_X64

yes, I ran cmd inside Powershell, because I already had it open :)
With a bit of luck, you'll be rewarded with a lovely new .cat file, and no errors or warnings!
(I say this because oh boy, I got PLENTY of warnings until I properly figured out the syntax of that inf file!)
But, there it is, now ready to be signed!
so, let's go sign that cat :)
4: Signing the driver